
Are you interested to create a portfolio section in your WordPress? Of course, that is why you are here. So, before jumping into ways, you have to clear with all terms such as what portfolio is, how it can benefit you, etc. with this you will get to know why you should do this.
WordPress is one of the largest content management system that has been used for many years. WordPress has a great collection of themed and advanced features that just make your work highly impressive to engage millions of users to your website.
The yet another way is sharing Portfolio, which holds the collection of beautiful images of your website in one place. For website owners, creating a portfolio section in WordPress is just a piece of ice on the cake.
WordPress offers numerous ways to create a portfolio with plugins. And if your website is all about sharing and creating portfolios, so you can use the WP Portfolio theme. Since there are many ways to create a portfolio, but in this blog, we will discuss only two of the best ways.
Table of Contents
Advantages of Adding Portfolio to the website
Portfolios come with great advantages that more likely to benefit your website too such as it makes your website better and easier to navigate for the users. Moreover, it helps you to link social media posts with your site easily that give vast exposure to your reader.
The only thing you need to do here is to link the best content of your website in it or link it to the best content of your site. Well, it’s quite complicated to understand how to do this. So, for you, we have shared the step by step guide on Create a Portfolio Section in WordPress.
How does creating a Portfolio Section helps your website?
There are numerous reasons WordPress owner or content curator uses the portfolio to enhance their content value and engagement. The best thing about the portfolio is it showcases the neat structure of your blog, which is easy to understand by a reader. This is something that usually engages more audience to share, comment, and like.
In WordPress, portfolios are easy to make. It will be a great opportunity for creative minds and new people as well. Moreover, this allows the readers to critique your content, or if you are getting unexpected comments then you can disallow the comments as well. Keep in mind one thing you are doing this for your audience so the more people you reach the more you will get chances to get high traffic to your website.
You may already know the value of Social media platforms these days. On these channels when you put the portfolio of a blog, you can see the real difference of getting the high audience to your website and pages. Moreover, this will allow your users that you are active on social media and you can create a portfolio section to share the lovely moments as well.
So, here we are going to take you to create a section.
How to create and install a Nimble Plugin to create a portfolio?
To create a portfolio section, first, you will need to install the Nimble portfolio plugin in WordPress. To do this follow the give steps.
1.Reach to the plugin area, click on add new button and search Nimble plugin in the search box.
2.You will find numbers of plugins just like that, but for better outcomes must choose Nimble.
3.Find out nimble and click on the install button and then activate it.
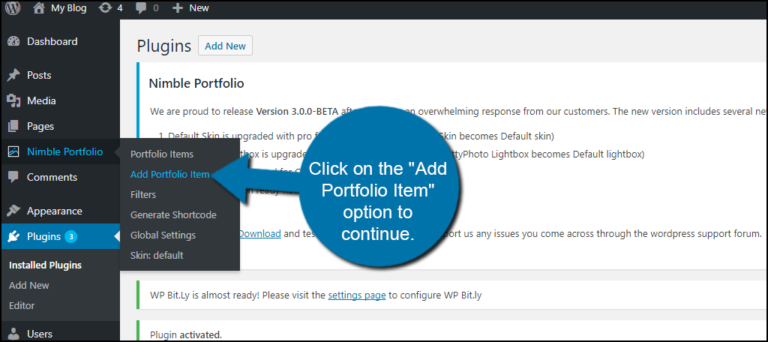
4.Now, you will see the nimble plugin to the left side of the window.
5.Then click on the add portfolio item button. With this, you will reach the main settings page.
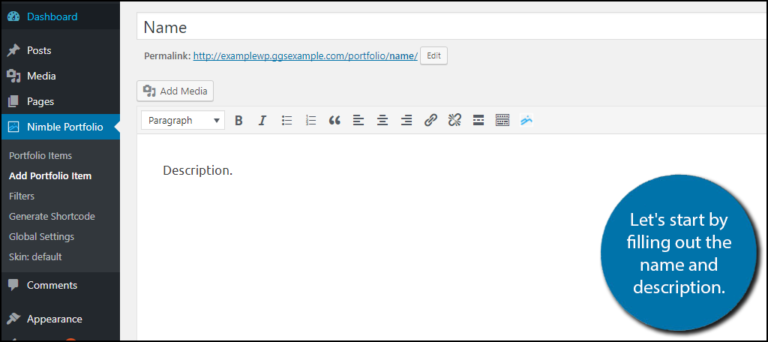
6.In this, you will need to fill out complete details such as name and description of the blog or portfolio.
7.If you want to add some filters, then click on + (add new filter) option. Here you’ll find the great set of filters that usually satisfy your post needs.
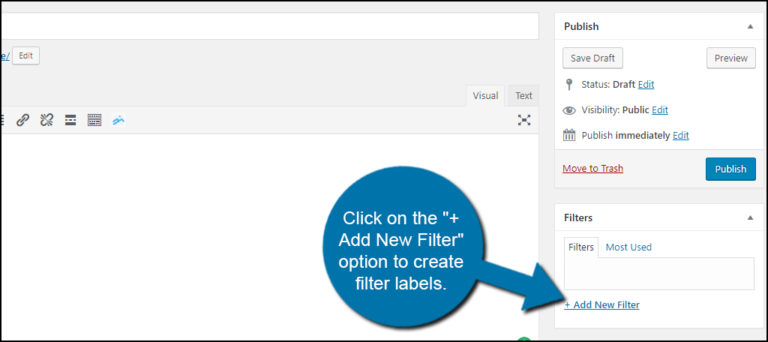
8.While doing this, you need to be creative. Once you have done with one filter name then click on add new filter and named it.
9.You’ll see the filter that you have named already, and this will manage your photos safely.
10.To upload images, scroll down little and here you will see upload an image option to upload. Whenever your user clicks on the image, it will open as a pop-up.
11.Save the changes and publish your portfolio publically.
You have completed the first stage and now you will need to insert these into pages. So to this follow the given steps.
1.On the left side of the window, reach the pages option.
2.Click on Add New button and name the portfolio with any name with this code [nimble-portfolio]
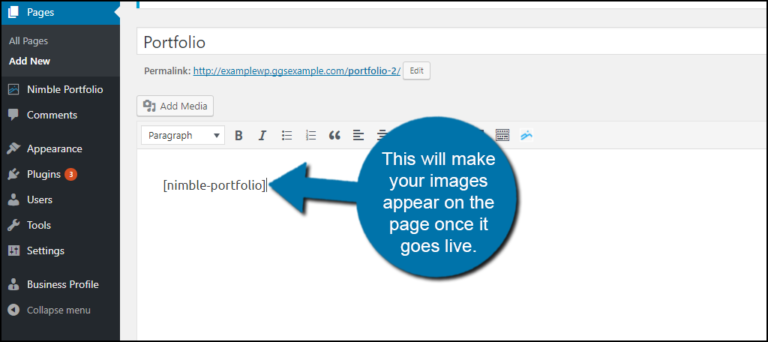
3.With this code, your images are allowed to go live.
4.Save the changes and publish that page to see the live changes.
5.You can see the images by clicking on the circle.
Done! You have completed both steps to go live with a portfolio to make your users more engaging with your content.
Plugins that help to create a portfolio in WordPress
As we said, WordPress provides various plugins to solve your issues easily. To create a portfolio section, you have some following great options to get started with.
· Gallery By Envira
It is one of the popular plugins that can resolve all issues related to creating and publishing portfolio. This comes with great numbers of features and tools to make this plugin worth it for you.
· Portfolio gallery
It is yet another the best portfolio creation plugin that used to create engaging and top quality portfolios. This also comes with various tools that generate shortcodes, sorting options, etc. automatically.
· WP Portfolio
This plugin includes great features such as custom upload image options, listings, and many more.
Choose your best way and make your website more appealing.